This is an old revision of the document!
Table of Contents
Private PSK 1 SSID Two Networks
Introduction
- This is our first use case and a very simple implementation.
- With this implementation we will:
- Create a WiFi network with a SSID called Campus PSK.
- Redirect unknown MAC Addresses to a captive portal.
- Allow known MAC Addresses onto our network.
- We keep things simple by using the same PSK on both networks.
- Although there are just one SSID and the PSK is the same, there are two networks and the network that the user will be landing on are determined by RADIUS.
- There are two main components to Private PSK
- The AP with the SSID that has Private PSK enabled.
- The RADIUS which return a client's Private PSK key and optionally a VLAN the client needs to be on.
The AP side
- We will start with the configuration of the Access Point in AP Desk.
- Select a cloud to work in and to to Networks → AP Profiles. Click on the Add button.
- Here we create an AP Profiles called Campus PSK.

- After we created it we will edit it.
- Each AP Profile has the following sections.
- General
- SSIDs
- Exit Points
- Common Settings
- Devices
- These section names should be self explanatory.
- We will be working on:
- SSIDs - We will Add an SSID called Campus PSK with Private PSK configured.
- Exit Points - We will define a bridge and Captive Portal. The Captive Portal will use An Internal Dynamic VLAN (We will use number5)
- Common Settings - We will define an Internal VLAN for the Captive Portal (We will use number5)
SSIDs
- Add the SSID with Private PSK encryption.
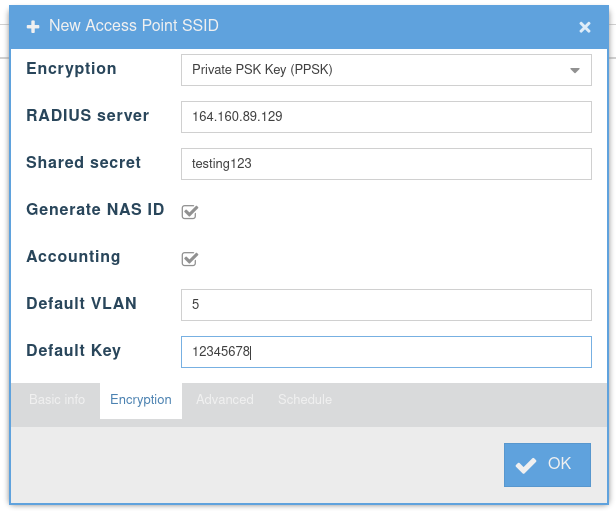
- Specify the RADIUS server of your choice. We will point to our RADIUSdesk server (The same server)
- After you created it there will be a red alert stating it is not connected to an Exit Point.
- Next we will do the Exit point
Although we specify a default VLAN number and defauly key they are there only for information purposes. Later when we configure the RADIUS Client we can consult these settings to specify matching values.
Exit Points Part1
- Add a bride exit point and connect it with the Campus PSK SSID.
- For the Captive Portal Exit Point we first have to create an Internal VLAN. We choose to use VLAN 5.
- This is specified under Common Settings.
Common Settings
- We will only use one internal VLAN in the AP.
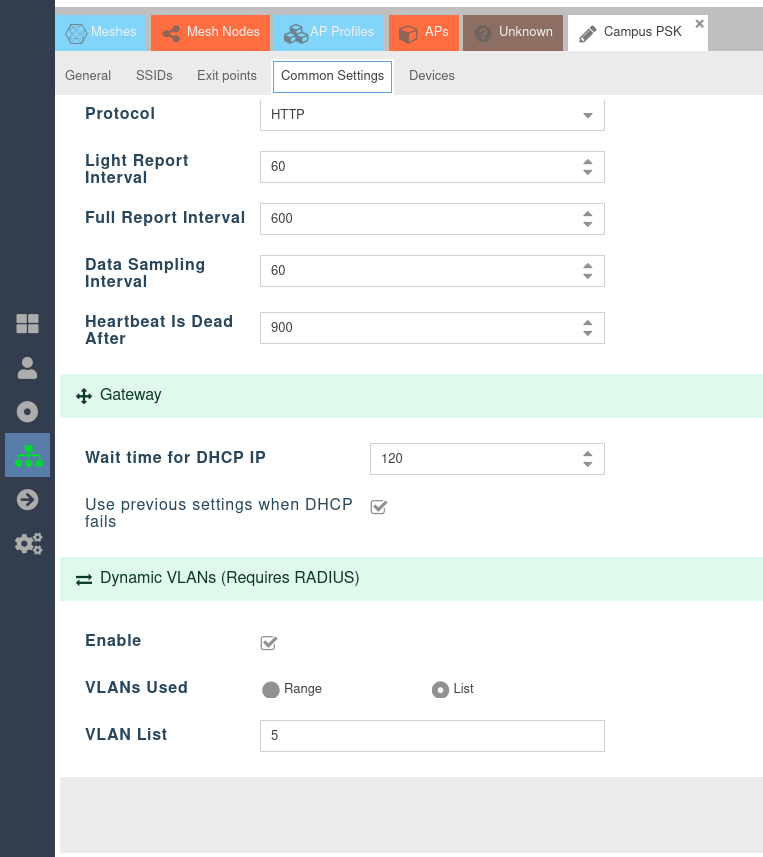
- We choose list and only specify one item (5).
- We can now co beck to SSIDs to define our Captive Portal Exit Point.
Exit Points Part2
- Add a Captive Portal Exit Point and specify that it connects with Dynamic VLAN5.

- Save everything.
- You should now have two exit points.
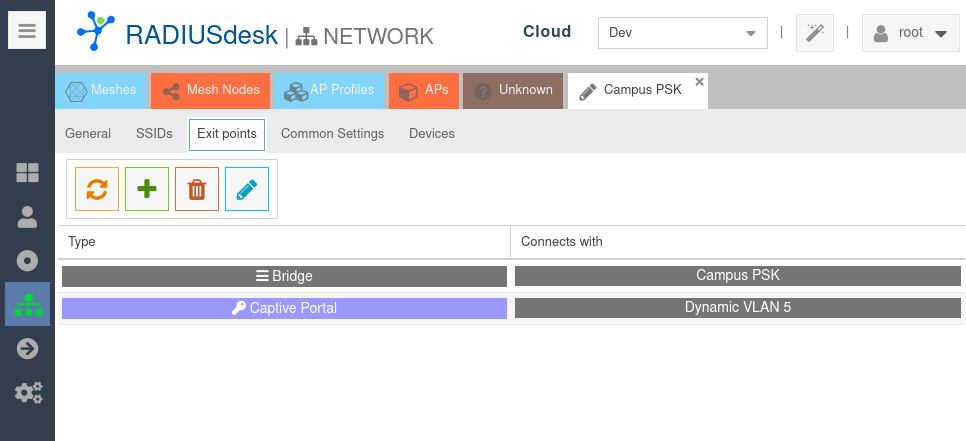
- As stated in the beginning we now have one SSID with Private PSK encryption and two networks.
- One network is a standard bridge.
- The other network is a Captive Portal.