This is an old revision of the document!
Table of Contents
Private PSK 1 SSID Two Networks
Introduction
- This is our first use case and a very simple implementation.
- With this implementation we will:
- Create a WiFi network with a SSID called Campus PSK.
- Redirect unknown MAC Addresses to a captive portal.
- Allow known MAC Addresses onto our network.
- We keep things simple by using the same PSK on both networks.
- Although there are just one SSID and the PSK is the same, there are two networks and the network that the user will be landing on are determined by RADIUS.
- There are two main components to Private PSK
- The AP with the SSID that has Private PSK enabled.
- The RADIUS which return a client's Private PSK key and optionally a VLAN the client needs to be on.
The AP side
- We will start with the configuration of the Access Point in AP Desk.
- Select a cloud to work in and to to Networks → AP Profiles. Click on the Add button.
- Here we create an AP Profiles called Campus PSK.

- After we created it we will edit it.
- Each AP Profile has the following sections.
- General
- SSIDs
- Exit Points
- Common Settings
- Devices
- These section names should be self explanatory.
- We will be working on:
- SSIDs - We will Add an SSID called Campus PSK with Private PSK configured.
- Exit Points - We will define a bridge and Captive Portal. The Captive Portal will use An Internal Dynamic VLAN (We will use number5)
- Common Settings - We will define an Internal VLAN for the Captive Portal (We will use number5)
SSIDs
- Add the SSID with Private PSK encryption.
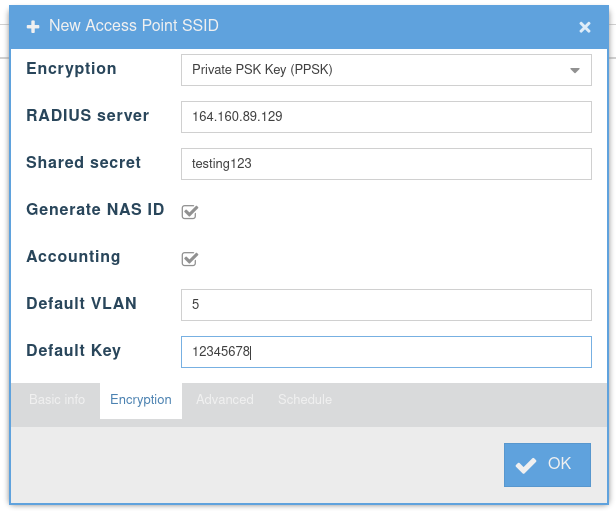
- Specify the RADIUS server of your choice. We will point to our RADIUSdesk server (The same server)
- After you created it there will be a red alert stating it is not connected to an Exit Point.
- Next we will do the Exit point
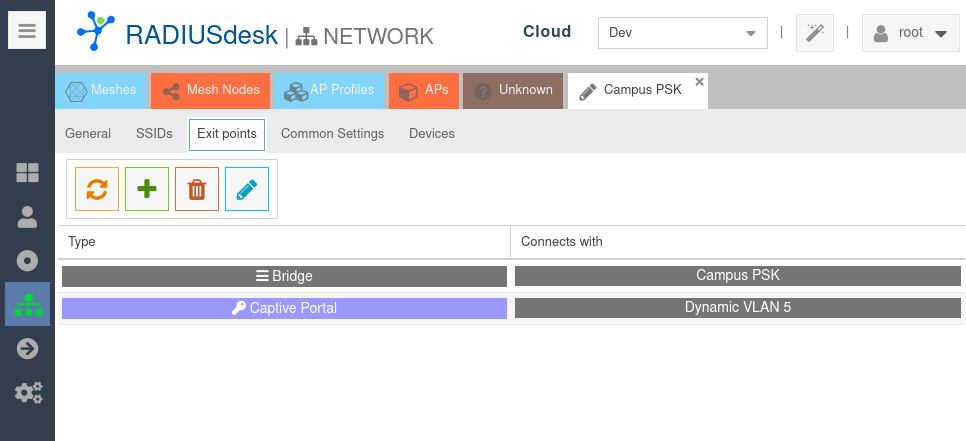
Exit Points Part1
- Add a bride exit point and connect it with the Campus PSK SSID.
- For the Captive Portal Exit Point we first have to create an Internal VLAN. We choose to use VLAN 5.
- This is specified under Common Settings.
Common Settings
- We will only use one internal VLAN in the AP.
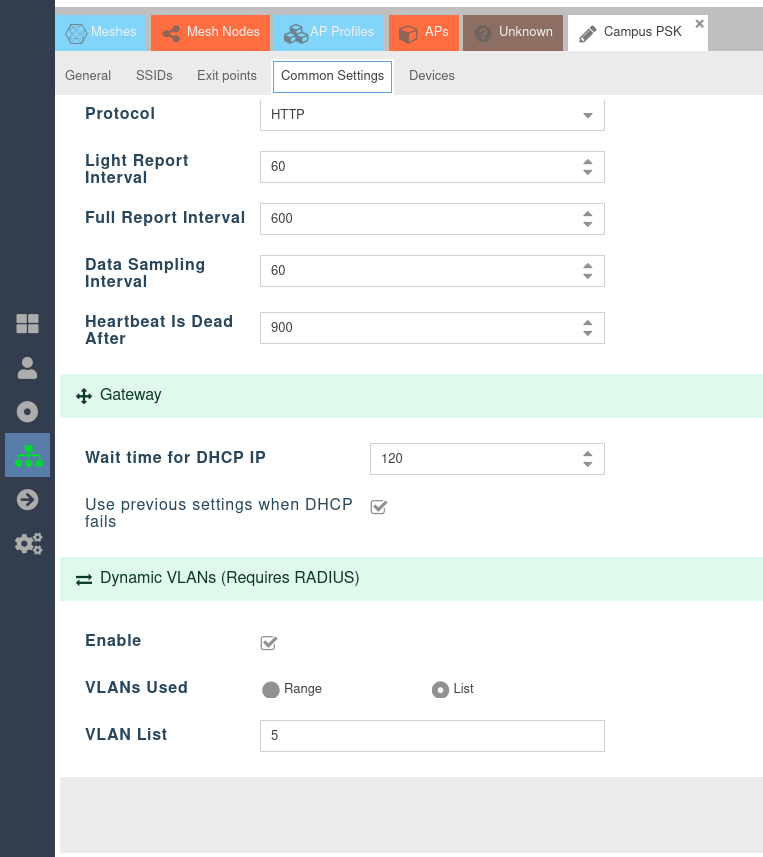
- We choose list and only specify one item (5).
- We can now co beck to SSIDs to define our Captive Portal Exit Point.
Exit Points Part2
- Add a Captive Portal Exit Point and specify that it connects with Dynamic VLAN5.

- Save everything.
- You should now have two exit points.