This is an old revision of the document!
Table of Contents
Login Pages - Settings
Introduction
- To fine tune the behavior of a Login Page you need to edit its settings.
- Rather than going through each item on the Settings tab, most of which are self explanatory, we will cover those more difficult items and places where you need a heads-up
Theme
- The default theme is called Default and it will redirect to the Bootstrap 5 page.
- There is a special theme called Custom which allows you to provide your own URLs where the redirection should go.
- There are also a couple of pre defined themes. Selecting one of those as a theme will redirect to the older Webix style login pages.
- The items on the drop-down is in fact defined inside the DynamicLogin.php file: https://github.com/RADIUSdesk/rdcore/blob/main/cake3/rd_cake/config/DynamicLogin.php
- One of the ideas around the Login Pages is to have a common URL for the captive portal e.g. https://cloud.radiusdesk.com/cake3/rd_cake/dynamic-details/chilli-browser-detect/
- The CakePHP Controller will then determine:
- Which login page to serve based on the value of Theme.
- Which language the page must serve based on the default language selected for the Login Page.
Slideshow
- When you added multiple photos you can use the slideshow feature.
- The duration per slide can be fine tuned by editing the photo's settings.
- You can also enforce the watching of the slideshow which will delay the pop-up of the login screen until after the specified time completed.
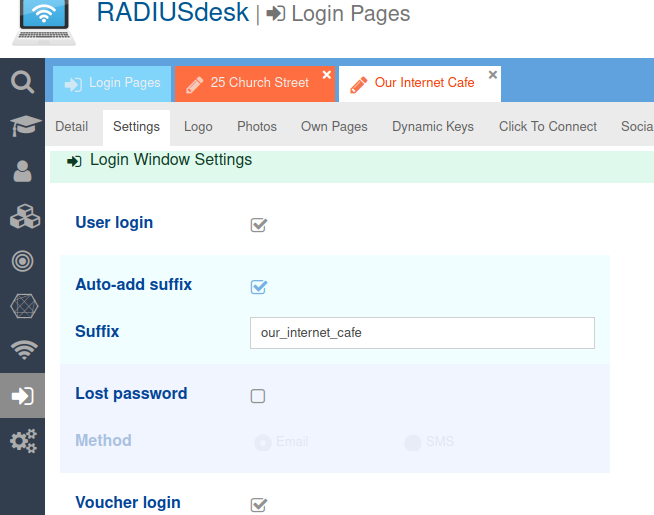
Auto-Add Suffix
- This feature is handy on pages where a Permanent User register by typically providing their email address and password.
- When the Permanent User is created (Provided the settings on the Realm is such) a suffix will be added.
- Thus you will have a username like dirk@gmail.com@our_internet_cafe.
- Specifying the Auto-add Suffix as our_internet_cafe will then automatically append that value to the username supplied by the user.
- They then simply have to remember their email address and the password they choose.
Sending Email
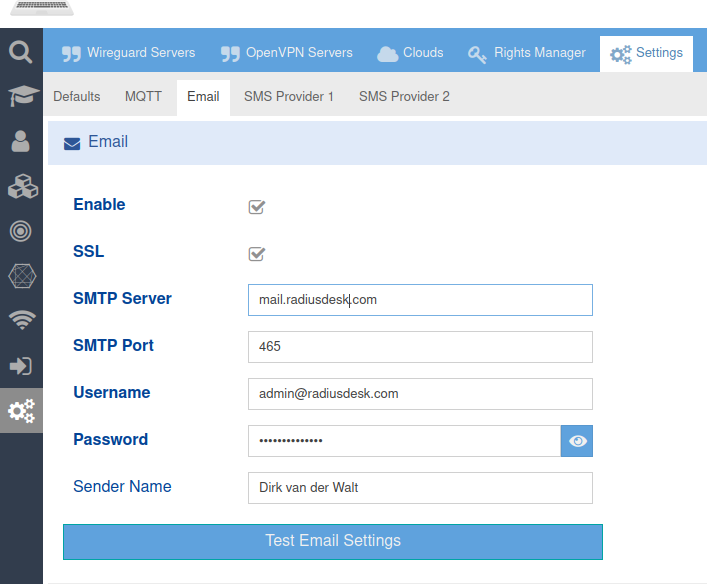
- There are two places where the system can send the user an email through a Login Page.
- The Lost Password option.
- The User Registration option.
- Remember you first have to configure the system with valid email settings for this to work.
T&C URL
- For T&C you can specify a URL
- Remember if this URL is located on another server, you have to add an entry to the Walled Garden of the Captive Portal for the user to reach this URL.
Show Usage
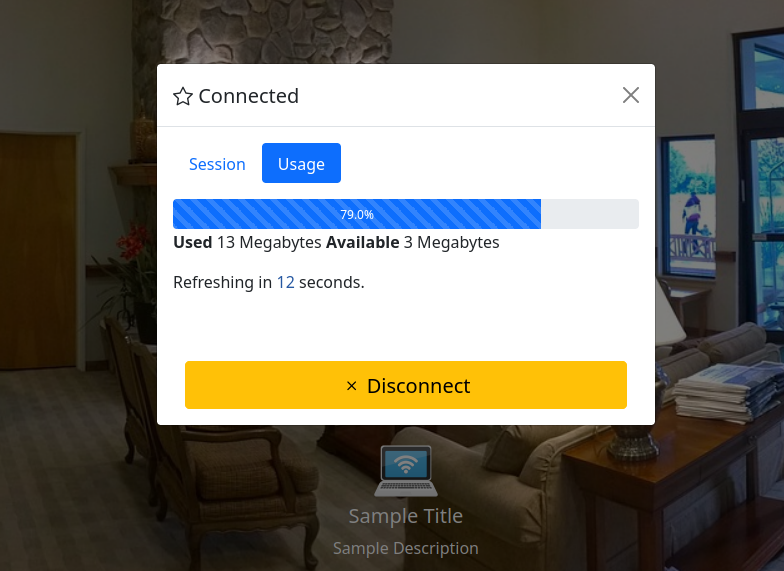
- There is an option where the page can display the usage to a user after they connected.
- This is handy for a voucher based system or a system that uses permanent users with top-ups.
Support for Arabic
- Support for Arabic is now also included.
- There are however a small tweak you should do for it to work in an optimal way.
- Edit the /var/www/html/login/bootstrap5/index.html page.
- Remove the default Bootstrap 5 Stylesheet.
<!--Comment the line below out if you are planning to implement languages including Arabic-->
<!--<link href="css/bootstrap.min.css" rel="stylesheet">-->
- Activate the inclusion of it in JavaScript (towards the bottom of the index.html page)
if(i18n == 'ar_AR'){
    $('#htmlMain').attr('dir','rtl');
    $('#htmlMain').attr('lang','ar');
    //RTL Stylesheet
    $('<link/>', {
       rel: 'stylesheet',
       type: 'text/css',
       href: 'css/bootstrap.rtl.min.css'
    }).appendTo('head');
}else{
    //Normal Stylesheet (if you did comment out the normal Bootstrap stylesheet - activate this section for non-arabic languages

    $('<link/>', {
       rel: 'stylesheet',
       type: 'text/css',
       href: 'css/bootstrap.min.css'
    }).appendTo('head');

}
- This tweak will allow the RTL and normal stylesheet to co-exist thus allowing you to serve pages in Arabic and other languages.
- Not doing the tweak will have a restricted effect on the RTL styling.
User Registration With Top-Up Profile
- When you enable user registration for a login page you have to specify the Realm and the Profile the newly registered user will belong to.
- One popular option is to choose a Data Top-Up type of profile.
- If you choose such a profile it is very important to give the user its first Top-Up value in order to impose a limit to the data the user can use.
Not adding an initial Top-Up will potentially give the user unlimited data usage
- The /var/www/cake3/rd_cake/src/Controller/RegisterUsersController.php file has a section which you can activate which will automatically add the initial Top-Up for you when the user registers.
- Simply change $add_topup = true; and specify the value of the initial Top-Up
//============== SMALL HACK 26 MAY 2022 ===============
//==== USE THIS TO ADD THE INITIAL DATA / TIME FOR USER REGISTRATION WITH **TOP-UP** PROFILES ====
//=====================================================

$add_topup = true;
if($add_topup){
    $postTopupData  = [
        'user_id'           => $q_u->id, //We make the owner of the Login Page the owner or the Top-Up
        'permanent_user_id' => $responseData['data']['id'], //Permanent User who gets the Top-Up
        'type'              => 'data',  //Type (data, time or days_to_use)
        'value'             => '10', //**Change VALUE**
        'data_unit'         => 'mb', //**Change VALUE**
        'comment'           => 'User Reg First TopUp', //Comment to ID them
        'token'             => $token //Token of the Login Page owner
    ];
    $topup_add_url  = 'http://127.0.0.1/cake3/rd_cake/top-ups/add.json';
    $topup_response = $this->_add_initial_topup($topup_add_url,$postTopupData);
    $postData['top_up'] = $topup_response;
}
//-----------------------------------------------
//======== SMALL HACK 26 MAY 2022 ===============
//----------------------------------------------
CoovaChilli Specific Settings
- As of June 2022 we added two options specific for CoovaChilli based captive portals.
- The one specifies that the JSON Interface is


